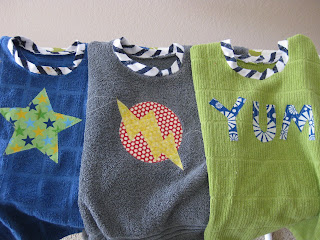
Andrew is learning to feed himself which means: lots and lots of spills and messes! He has outgrown his old bibs and needed something a little bigger and something a little harder to rip off! So here's how I made his new Towel Bibs! I was able to whip up three during his nap.


1. I cut up an old shirt into 2 inch strips to use as the neck binding.
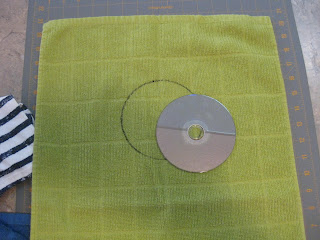
2. I used a CD (and later used a smaller IKEA bowl because the CD was just too big) to trace around for the neck hole.


3. I measured enough binding to go around the neck hole and sewed it to make a circle.
4. Pin the binding in place.


5. Sew around the binding using about a 1/2 inch seam.
6. Under stitch the raw edges to the inside of the towel (this will help the neck binding the stay flat.


7. Next I appliqued some fun shapes using Heat n Bond and zig zagging around the edges.
8. Check it out! Three cute towel bibs that will keep Andrew's shirts clean from drips, drops and spills!


1. I cut up an old shirt into 2 inch strips to use as the neck binding.
2. I used a CD (and later used a smaller IKEA bowl because the CD was just too big) to trace around for the neck hole.


3. I measured enough binding to go around the neck hole and sewed it to make a circle.
4. Pin the binding in place.


5. Sew around the binding using about a 1/2 inch seam.
6. Under stitch the raw edges to the inside of the towel (this will help the neck binding the stay flat.


7. Next I appliqued some fun shapes using Heat n Bond and zig zagging around the edges.
8. Check it out! Three cute towel bibs that will keep Andrew's shirts clean from drips, drops and spills!


cute!!!
ReplyDeleteI'm trying to decide if I love you for putting up pictures so I can copy off of you, or if I hate you for doing these AFTER I left NM!!! :) I'm gonna go with loving you. It's better for our friendship. :)
ReplyDelete